Charcuterie Cups That Look Expensive (But Are Easy): A Real-World Guide for Parties in Canada
Charcuterie cups are one of those party foods that make people stop for a second.
They’re small, they look put-together, and they feel “planned” even when you made them in your kitchen with a grocery haul and a bit of patience. They work for birthdays, showers, office events, or just a casual get-together where you don’t want a big board getting crowded.
And yes, they’re trendy. But they’re useful too. Guests can grab one, mingle, and snack without needing a plate, knife, or a spot at the table. That alone makes charcuterie cups worth it.
This guide is here for the real questions people actually have:
- What goes in a cup so it looks full, not empty?
- How many cups do I need for 12 people? For 30?
- How do I keep things fresh so the fruit doesn’t look tired?
- Can I prep them ahead without ruining the texture?
- What do I do for nut-free, gluten-free, or vegetarian guests?
Let’s get into it properly.
What are charcuterie cups (and why people love them)?
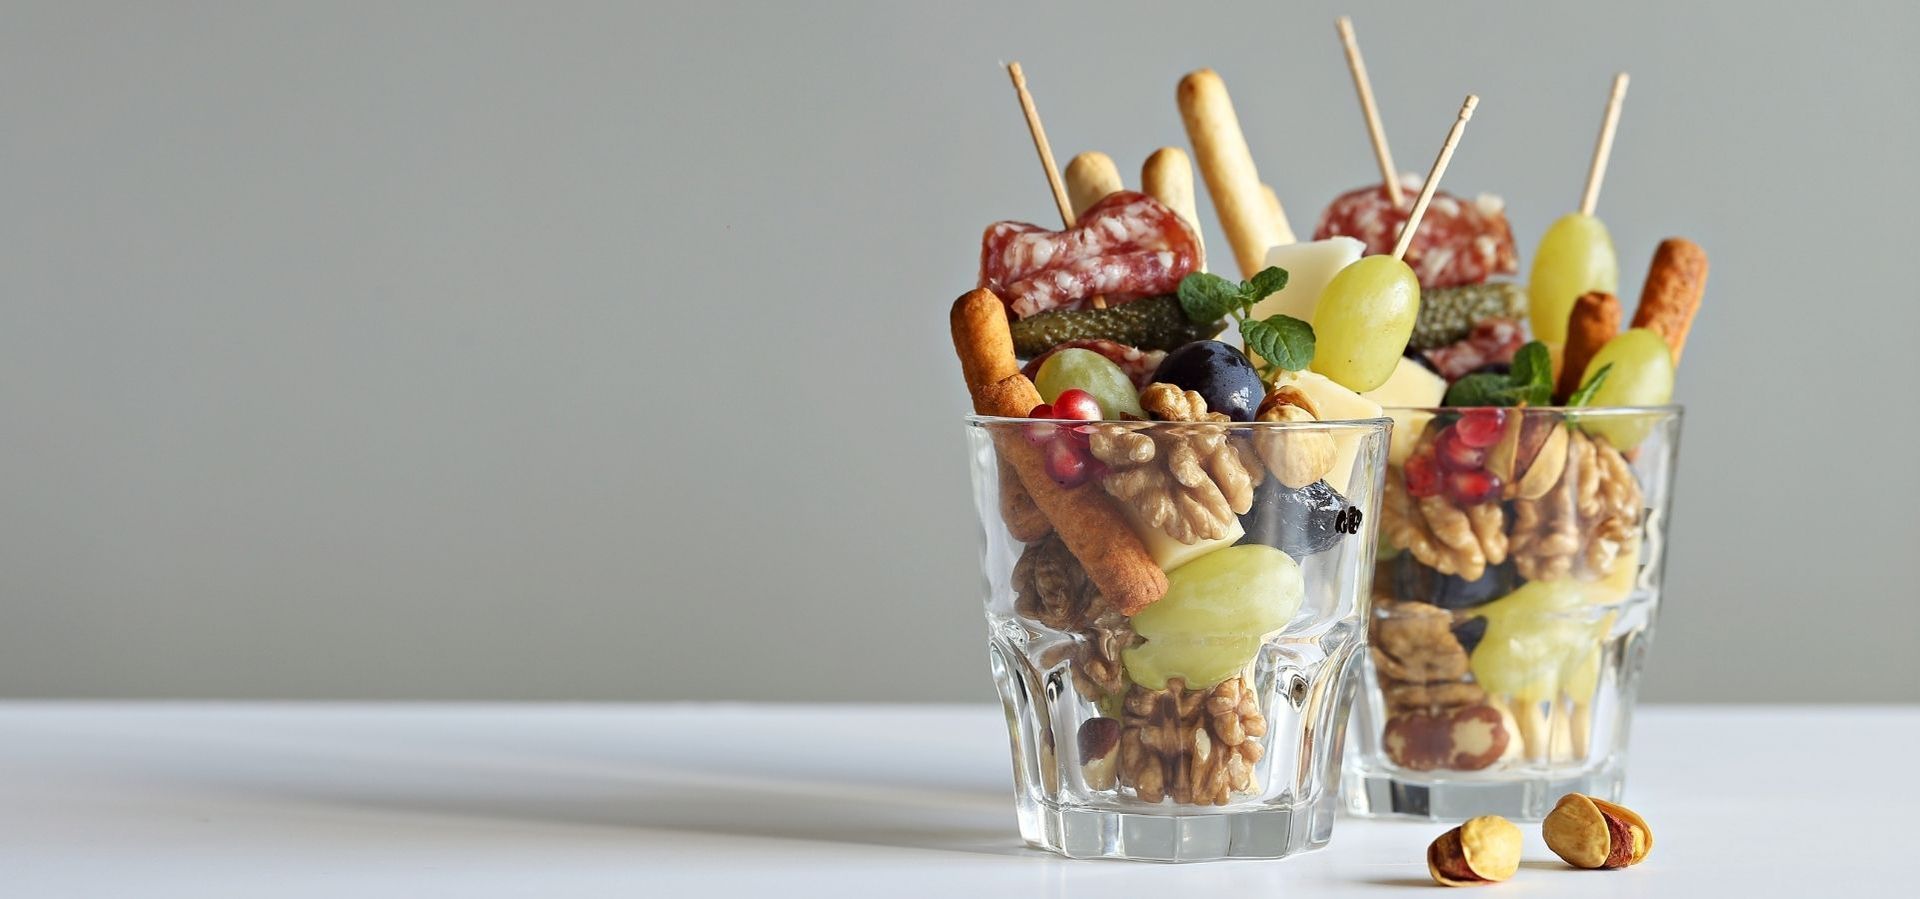
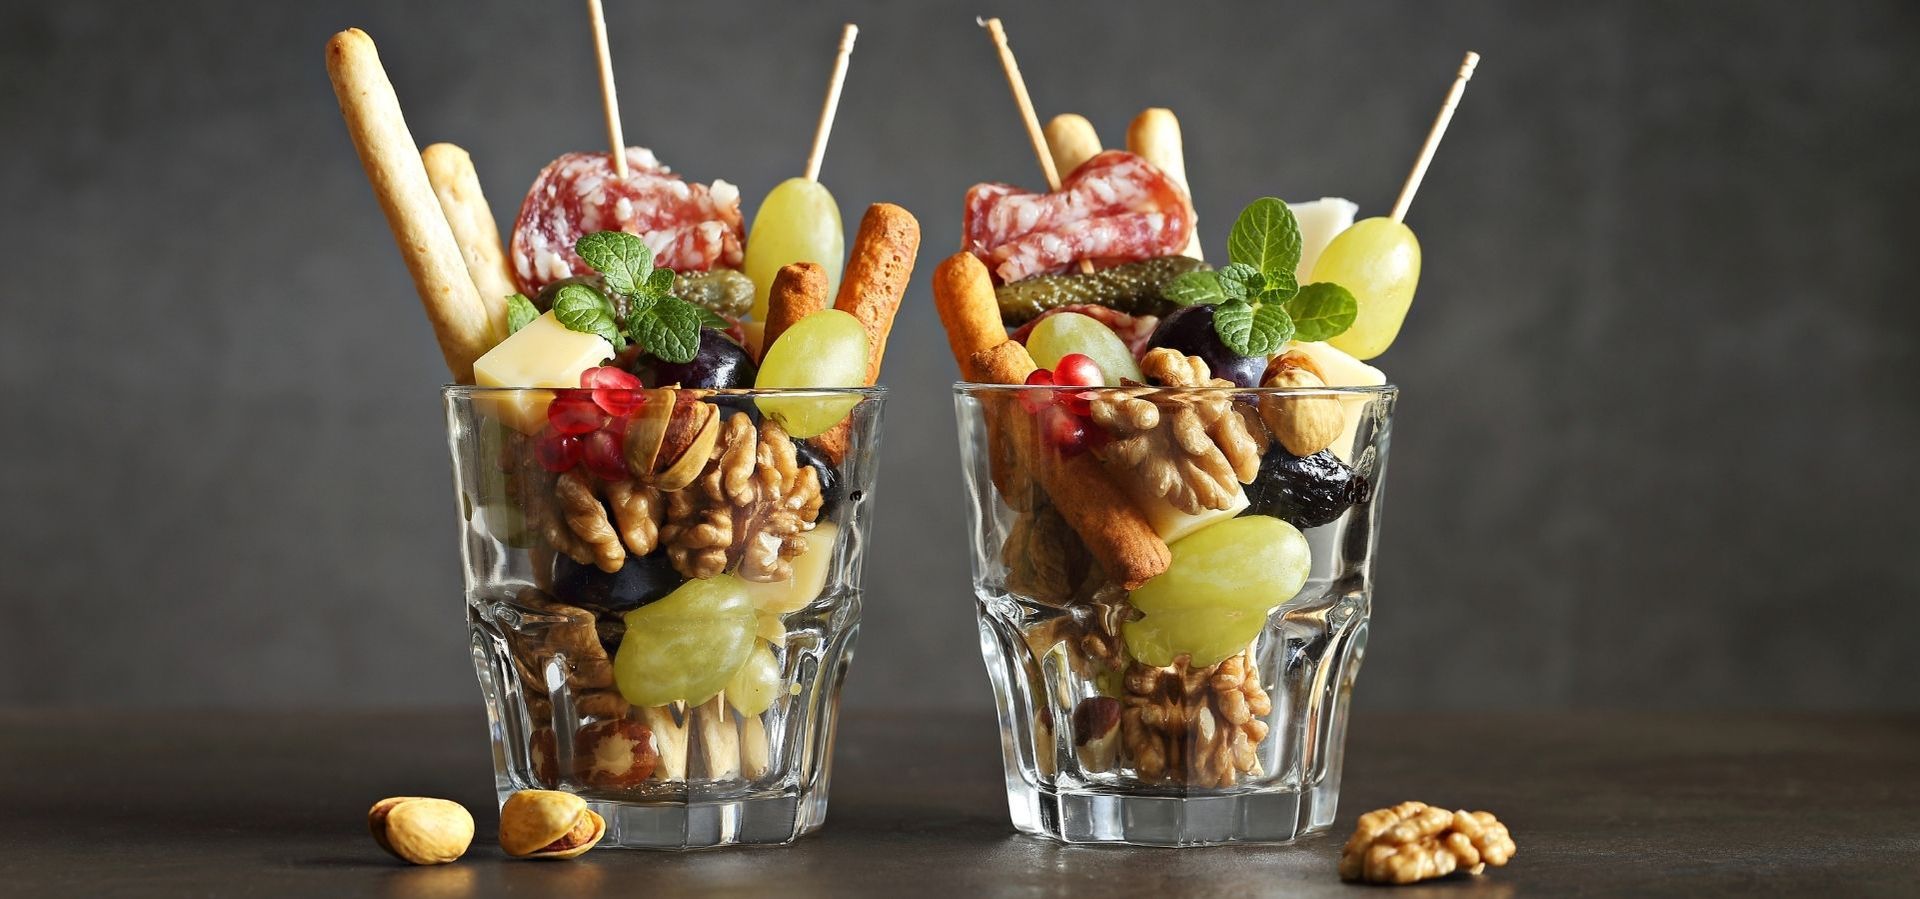
Charcuterie cups are individual servings of a charcuterie board, served in a small cup. Think meat, cheese, fruit, something crunchy, and one or two extras. That’s the base.
People like them for a few reasons:
- Everyone gets their own portion, so there’s less hovering over the food table
- They’re easy to hold, even if guests are standing
- They look styled, even without fancy skills
- They help with clean serving, which still matters to a lot of people
- You can make them feel “custom” without making separate trays for everyone
Feast + West talks about portability and how great they are for events where guests mingle, which is true.
Other recipe blogs keep it simple with general ingredient lists, which is fine… but that’s where people still get stuck mid-prep.
This post is the part most blogs skip: how to build cups that actually hold up.
The 3 cup sizes that work best (and what each one is good for)
Before you even shop, pick your cup size. It changes everything.
1) 5 oz cups (small, cute, “one bite here, one bite there”)
Best for:
- cocktail hours
- big gatherings with lots of appetizers
- kids parties (less waste)
What fits:
- 1 cheese portion (2 to 3 cubes)
- 1 folded meat rose OR 2 to 3 salami slices
- a few grapes or berries
- 1 small crunchy item (pretzels or mini crackers)
These look great on a tray, but they fill up fast, and you can’t overload them.
2) 8 oz cups (the sweet spot for most parties)
Best for:
- birthdays
- baby showers
- bridal showers
- holiday gatherings
- “snack dinner” nights
This is the size where charcuterie cups stop looking like samples and start looking like a real snack.
What fits:
- 2 cheeses (or one cheese + one fun bite like mozzarella pearls)
- 2 meats (or a bigger portion of one)
- fruit + crunchy item
- one extra (like olives or a mini chocolate)
Pretty Party Platters even lists both round 8 oz and square 5 oz options on their cup page, which matches what most hosts end up using.
3) 12 oz cups (heavier snack, fewer needed)
Best for:
- corporate lunches
- longer events
- replacing a full appetizer plate
- when you don’t want to refill trays
Be careful with this size. They can look a little “too full” if you pack them without thinking. You want it styled, not stuffed.
The easiest formula for charcuterie cups (that looks balanced)
If you remember one thing, make it this:
A good charcuterie cup has:
1 crunchy + 1 cheese + 1 meat + 1 fruit + 1 “pop” item
That’s it.
Crunchy (pick 1)
- mini crackers
- breadsticks
- pretzel sticks
- pita chips (broken into small pieces)
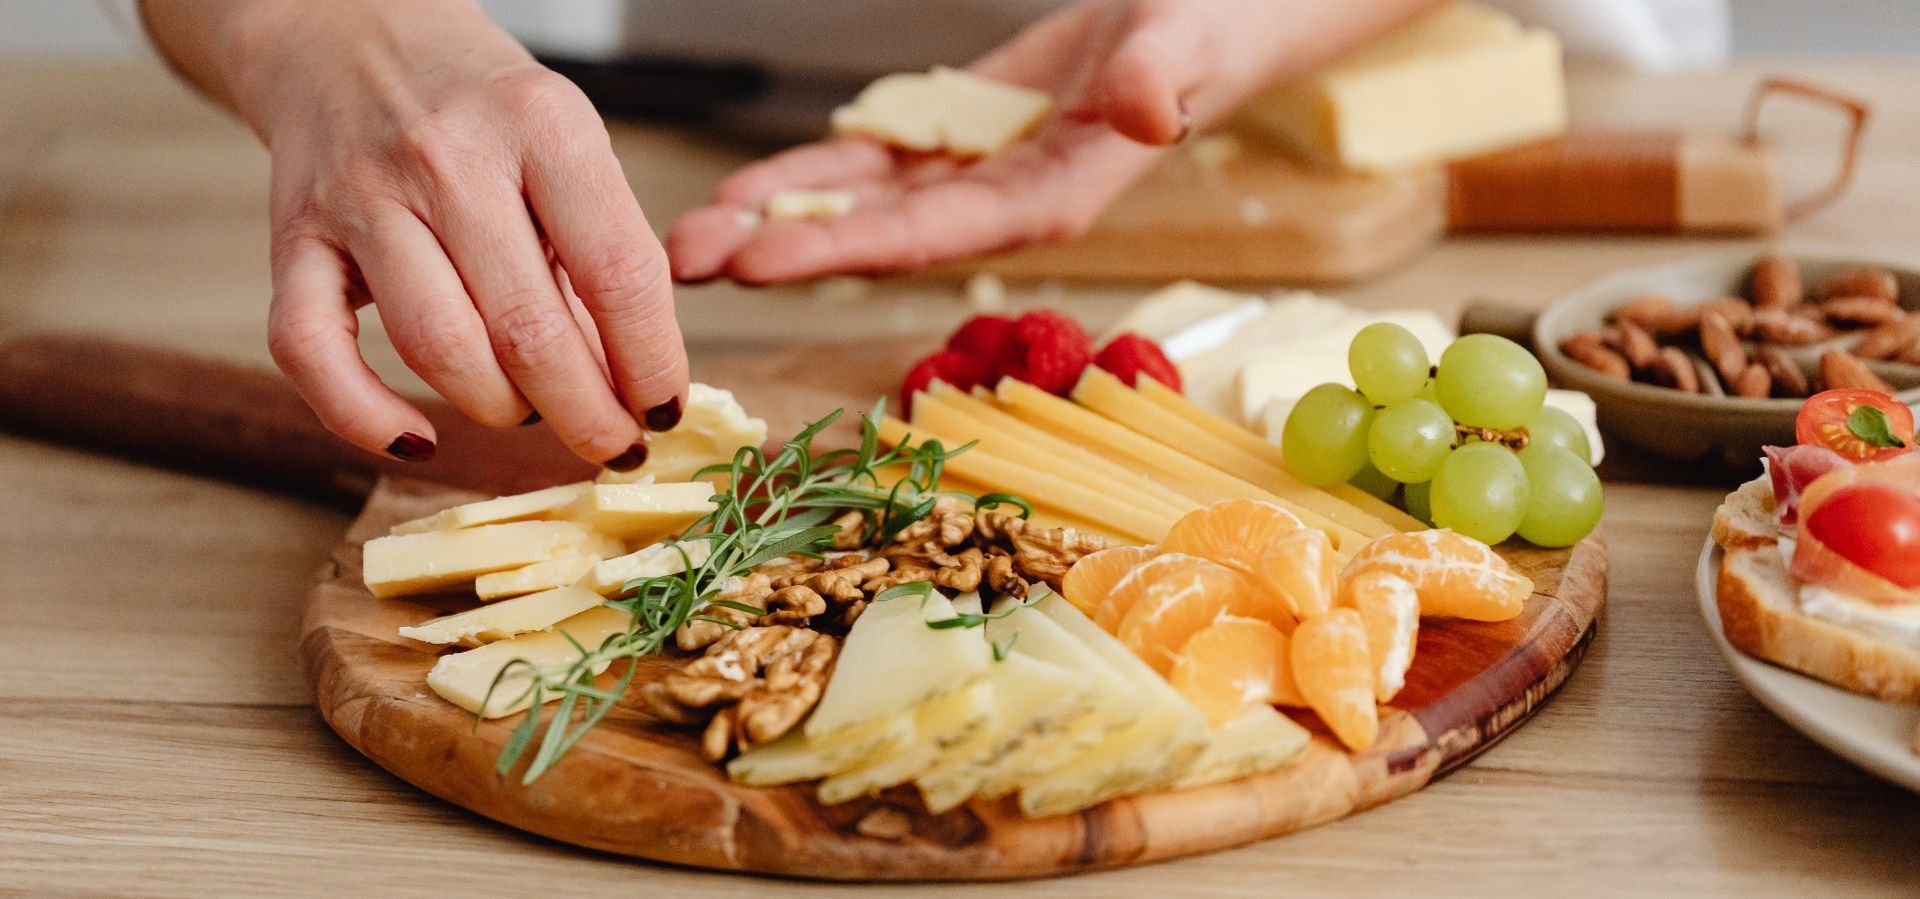
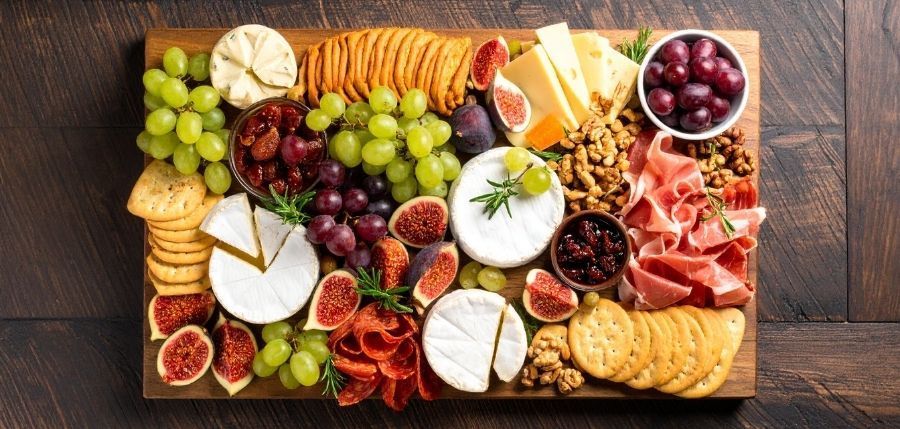
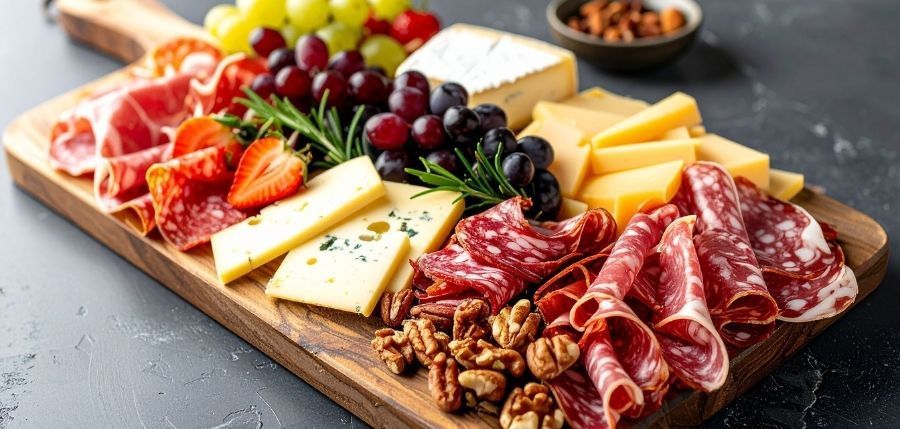
Cheese (pick 1 to 2)
- cheddar cubes
- gouda cubes
- marble cheese (classic in Canada and it works)
- brie pieces (small wedge or cube, but keep it firm)
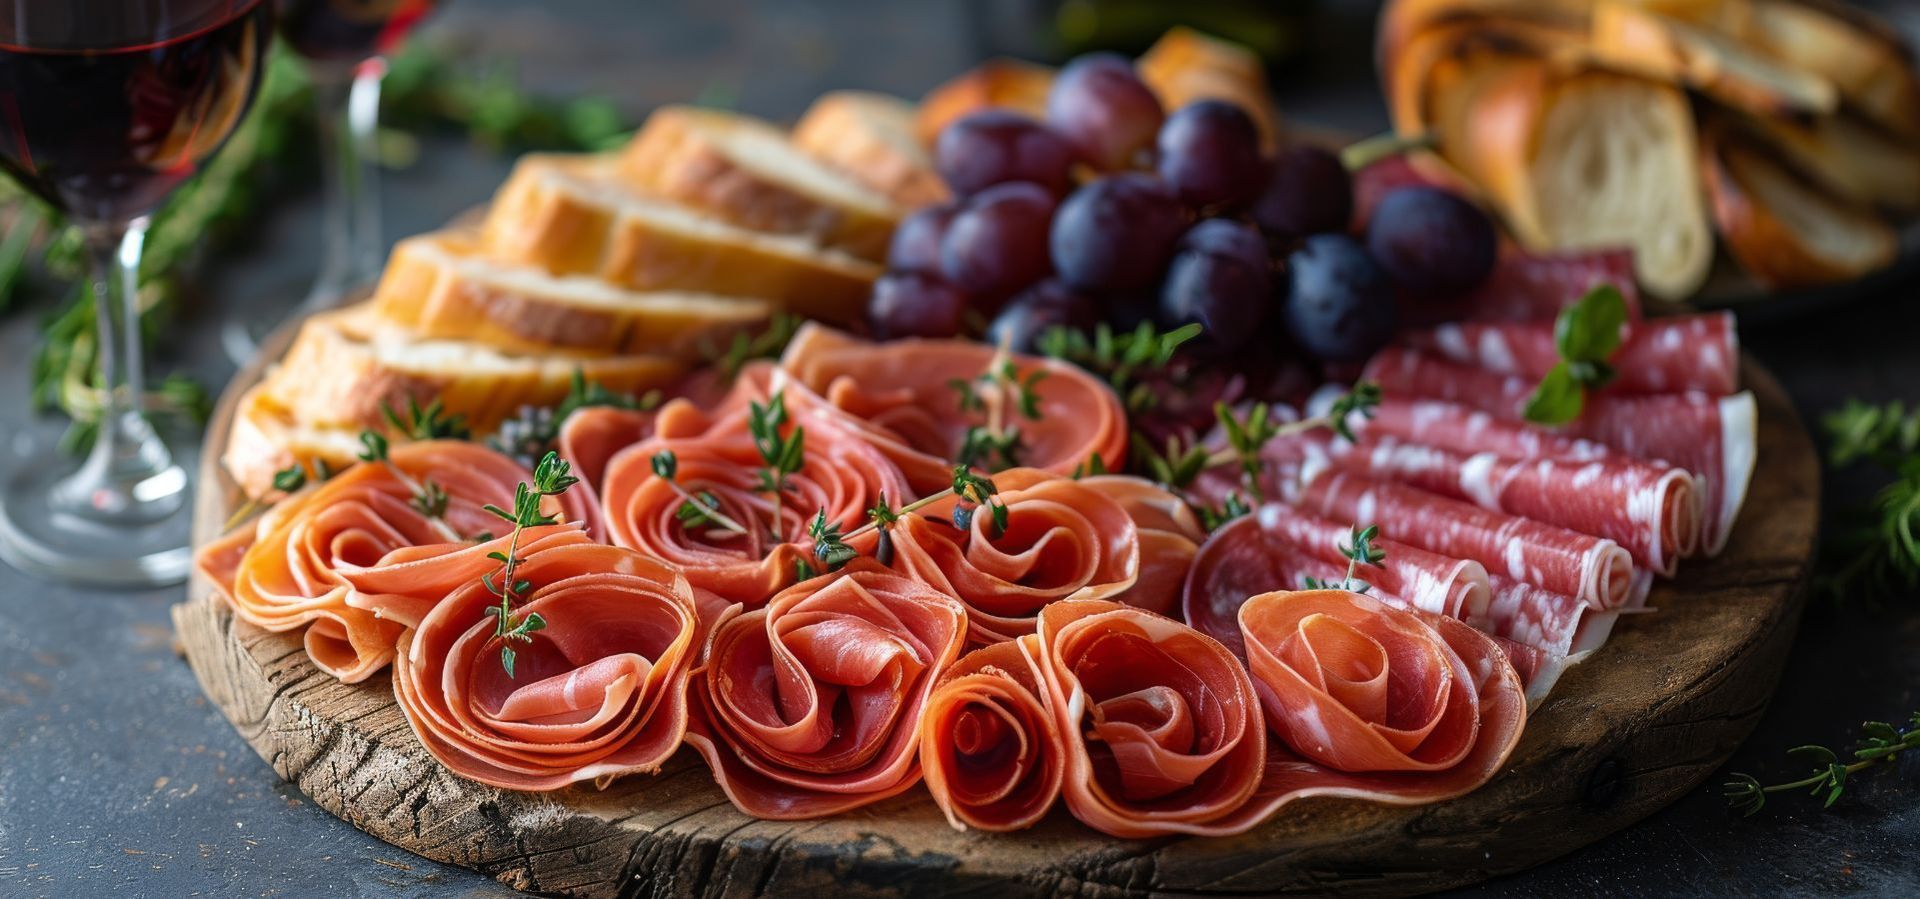
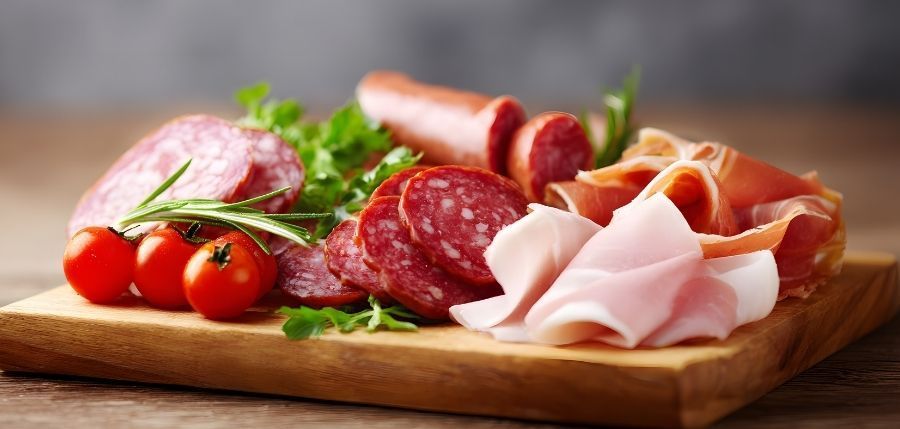
Meat (pick 1 to 2)
- salami slices (easy)
- soppressata (a bit bolder)
- prosciutto (pretty, but trickier)
- turkey pepperoni (kid-friendly)
Fruit (pick 1)
- grapes (best choice, almost always)
- strawberries (cut and dry them)
- blueberries (easy filler)
- blackberries (great look but can bruise)
“Pop” item (pick 1)
This is what makes people say, “oh this is nice.”
- a mini pickle
- a couple olives
- dried apricots
- chocolate-covered almonds
- a little dollop cup of jam (if you want extra steps)
The competitor cups often rely on rosemary sprigs for looks, and yes, it’s pretty.
But you don’t have to do herbs if you don’t want to. It’s optional.
What to put at the bottom so cups don’t look empty
This part feels silly until you’re making them and you realize the cup looks half-full.
You need a base layer. Something small, safe, and “dry.”
Good bottom fillers:
- pretzels
- small crackers
- mini bread rounds
- nuts (only if you’re sure no allergy issue)
Avoid these as a bottom base:
- juicy fruit (it leaks)
- soft cheese (it smears and looks messy)
- wet olives (they stain and make things slippery)
If you do this right, your cups will look full without needing tons of expensive cheese.
How to build charcuterie cups so they stay neat (and don’t fall apart)
Here’s a method that stays simple and works fast.
Step 1: Set up your station
Put everything in small bowls. Don’t keep things in the package. It slows you down and looks chaotic.
I usually place them in this order:
crunchy → cheese → meat → fruit → extras
Step 2: Add the base layer
A small handful of pretzels or crackers at the bottom.
Step 3: Add cheese next
Cheese is your “weight.” It anchors the cup.
Add 3 to 5 cubes. Don’t overthink the shape. Cubes look clean.
Step 4: Add fruit on one side
Grapes are the easiest. They don’t leak much, they look fresh, and they fill space fast.
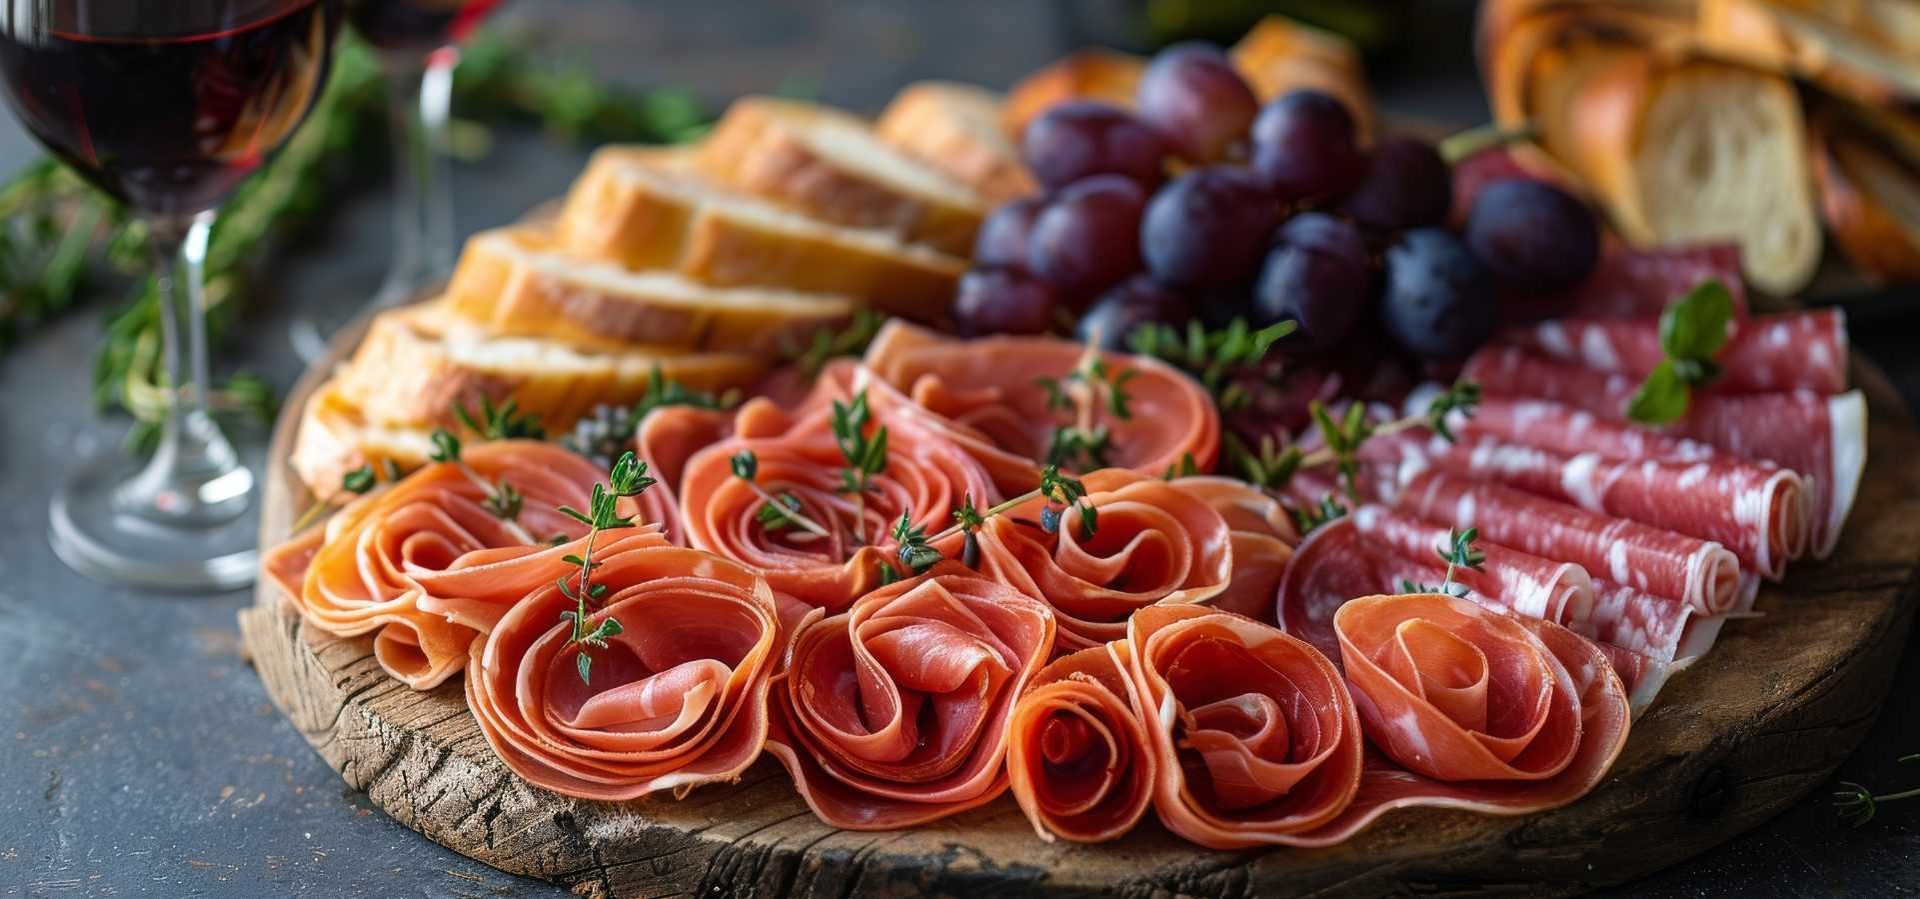
Step 5: Add the meat last, at the top (this is the visual part)
Salami folds well. Prosciutto looks fancy but tears if you rush.
Quick trick:
- Fold salami into quarters and tuck it in like a fan
- If you want the “rose” look, roll it and stack it tighter
Step 6: Finish with one “extra”
Pickles, olives, chocolate, a mini cookie, whatever matches your event.
At this point, your charcuterie cups should look full, clean, and not overloaded.
The biggest mistake people make: soggy crackers
If you’ve ever made cups ahead and thought, “why does this feel soft?”
That’s why.
Soggy crackers happen when:
- fruit touches crackers
- olives or pickles sit against bread
- cheese sweats because it sat warm too long
How to stop it
- keep crackers taller, tucked behind the meat or cheese
- don’t put juicy fruit on the bottom
- keep wet items like olives in the middle, away from crunch
- store cups cold and covered
If you want to be extra safe, you can add crackers right before serving. It’s a little annoying, but it works.
Charcuterie cups for different events (so the vibe matches)
This is where you can make your cups feel “right” for the party. Same format, different mood.
Birthday party charcuterie cups
Go simple, crowd-friendly:
- cheddar + marble cheese
- turkey pepperoni + salami
- grapes + strawberries
- pretzels + mini cookies
Baby shower charcuterie cups
A little softer, a bit sweeter:
- brie + cheddar
- prosciutto (or mild salami)
- berries
- honey sticks or chocolate
Bridal shower charcuterie cups
Make them look expensive:
- gouda + brie
- prosciutto + soppressata
- grapes + blackberries
- rosemary (if you want that look)
Holiday charcuterie cups
Seasonal but still easy:
- aged cheddar
- salami
- dried cranberries or dried apricots
- pretzels
- rosemary sprig (holiday classic)
Corporate event charcuterie cups
Keep it neat, low-mess, and safe:
- hard cheeses only
- seedless grapes
- crackers that won’t crumble everywhere
- no super garlicky items
- label allergens clearly
How many charcuterie cups per person? (real numbers)
This depends on what else you’re serving.
If charcuterie cups are a starter and you have dinner later:
- 1 cup per person
If charcuterie cups are the main snack table item:
- 1.5 cups per person (some people will grab two)
If it’s a long event (3+ hours) and food is the main thing:
- 2 cups per person
And yes… kids count differently.
Some kids eat two bites and disappear. Some eat three cups. It’s random.
If you’re unsure, go 1.5 per person. It’s the least stressful.
Shopping list for 12 charcuterie cups (8 oz size)
Here’s a realistic grocery list that won’t leave you with weird leftovers.
Cheese
- 450g to 600g cubed cheese total
- (2 types is enough)
Meat
- 250g to 350g sliced meat
- (1 to 2 types)
Fruit
- 2 to 3 cups grapes
- 1 to 2 cups berries (optional)
Crunch
- 1 box small crackers
- 1 bag pretzels or breadsticks
Extras
Pick 1 or 2:
- olives
- mini pickles
- dried fruit
- chocolate pieces
This lines up with most charcuterie cup ingredient layouts you’ll see online: cheese cubes, salami, grapes, berries, pretzels, crackers.
Canadian ingredient ideas (simple swaps that work)
If you’re shopping in Canada, you’ll notice certain items show up everywhere, and they actually work well in charcuterie cups.
Easy Canadian-friendly picks:
- aged cheddar (you can’t go wrong)
- smoked gouda (adds depth)
- mini babybel cheese (great for kids cups)
- turkey pepperoni
- maple almonds (only if allergy-safe)
- dried cranberries
- mini naan crackers
If you’re building cups for a mixed crowd, cheddar + salami + grapes is the safest base. It’s not fancy, but people eat it.
Dietary options (without making separate food feel “sad”)
You don’t need to make 30 different versions. You just need a few smart swaps.
Vegetarian charcuterie cups
Replace meat with:
- extra cheese
- cucumber slices
- roasted peppers
- olives
- marinated artichokes (dry them first)
Gluten-free charcuterie cups
Use:
- gluten-free crackers
- pretzels made for gluten-free diets
Keep crackers separate until the end if you can. Some GF crackers soften fast.
Nut-free charcuterie cups
Simple rule:
skip nuts entirely
Even if you think it’s fine, you can’t always know.
Halal-friendly charcuterie cups
Use:
- halal turkey slices or beef salami
- more cheese and fruit
- skip pork-based meats
This comes up more often than people expect in Canada, especially at bigger events.
Can you make charcuterie cups ahead of time?
Yes. You just need to plan it right.
Best timeline
Up to 24 hours ahead works well for most cups.
What to prep early
- cut cheese
- wash and dry fruit
- portion crackers
- prep extras (pickles, olives)
What to add closer to serving (if you can)
- crackers and breadsticks
- any herbs
- very soft cheeses
How to store them
- cover with plastic wrap or place in a covered tray
- refrigerate
- keep them away from strong-smelling foods
If the fridge smells like onions, your cups will pick it up a bit. It’s annoying but true.
Food safety tips (short, clear, useful)
These are the basics that protect you and your guests:
- keep cups cold until serving
- don’t leave them out longer than 2 hours
- use clean hands or gloves while assembling
- avoid cutting fruit too early
- don’t reuse cups that sat out all night
If you’re hosting outdoors in summer, you’ll want to rotate trays and keep backups in the fridge or cooler.
Charcuterie cups that look “full” without costing a lot
This is the part people care about, quietly.
Cheese and meat get expensive fast. So your best fillers are:
- grapes
- crackers
- pretzels
- dried fruit
And use smaller cuts:
- cut cheese into smaller cubes
- fold meat instead of stacking it flat
Flat slices look cheap. Folded slices look styled. Same meat.
Quick charcuterie cup combos you can copy
If you want “no thinking” options, use these.
Classic crowd-pleaser
- cheddar cubes
- salami folds
- red grapes
- pretzel sticks
- mini pickle
Sweet + salty
- gouda cubes
- prosciutto
- strawberries
- crackers
- dark chocolate piece
Bold and savoury
- smoked cheddar
- soppressata
- olives
- grapes
- pita chips
Kids-friendly
- marble cheese
- turkey pepperoni
- grapes
- mini crackers
- fruit gummies (yes, it works)
That last one might sound odd, but kids actually eat it. Adults won’t complain either.
Where charcuterie cups fit best at a party
Charcuterie cups work best when guests:
- arrive at different times
- snack while standing
- don’t want to commit to a full plate
They’re great for:
- entrances and welcome tables
- buffet lines as a “grab now” option
- bridal shower grazing tables
- office lunches
And if you already do boards and boxes, cups add variety. People love variety.
Want to skip DIY? (and still impress guests)
Making charcuterie cups is fun… until you’re doing 40 of them the night before an event. That’s when it stops being relaxing.
If you’re hosting and you want it done right without the prep mess, you can always order ready-made charcuterie cups for your event and focus on everything else. Pretty Party Platters offers mini cups as a party option, and it’s the kind of thing guests remember because it looks polished